Table of Contents
- Application Window
- Applications Overview
- Using Applications
Application Window
Opening the Application Window
When you first log in to the portal, if you have access to more than one application, the Application Window will open automatically. Otherwise, you will be taken to the only application you have access to use, or if there are none, you will be automatically taken to your User Profile. To open the Application Window otherwise, click on the button at the top center of the screen.

Selecting an Application
With the Application Window open, you may select an application that you have access to through your group(s). First, select the product you wish to access by selecting the corresponding tab along the top of the window. Then, select which application group by opening the slide menu for it. Finally, click on the icon for the application you wish to open. The Application Window will close and the selected application will load.
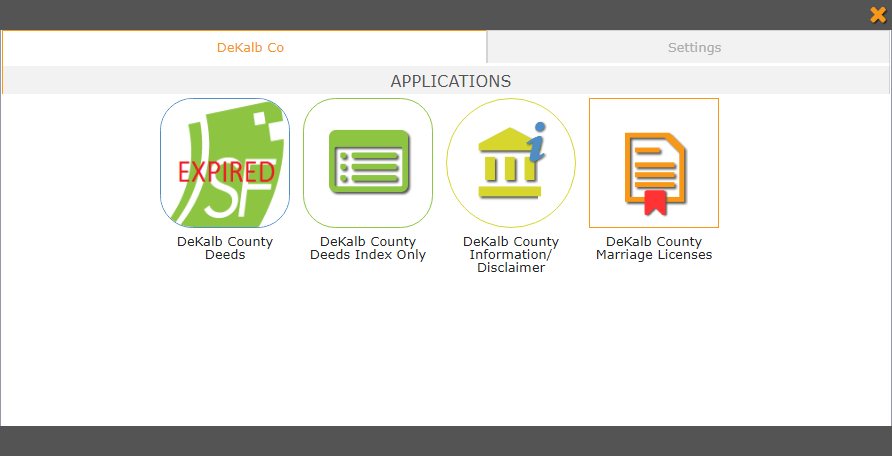
Some applications may require paid access to open. If you do not have access to them, either because you have not paid or your paid access has expired, the icon for the application will read "EXPIRED."
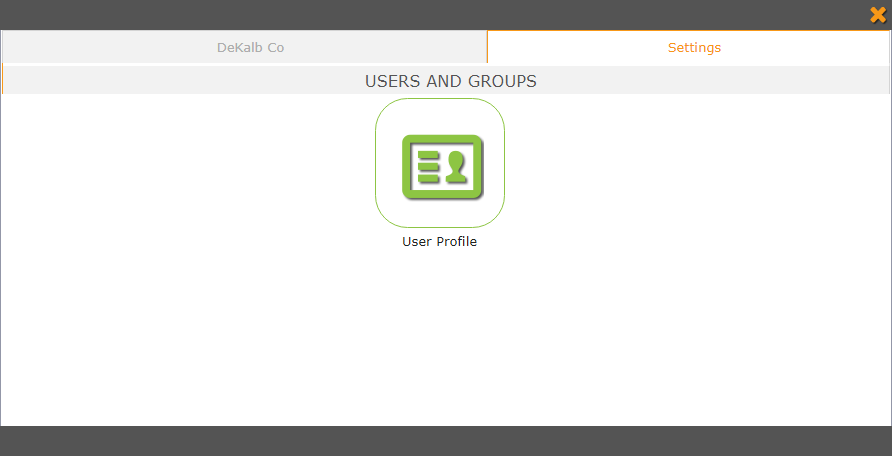
To view your User Profile, go into the Settings tab at the right side of the Application Window and select the User Profile application.
Applications Overview
Search View
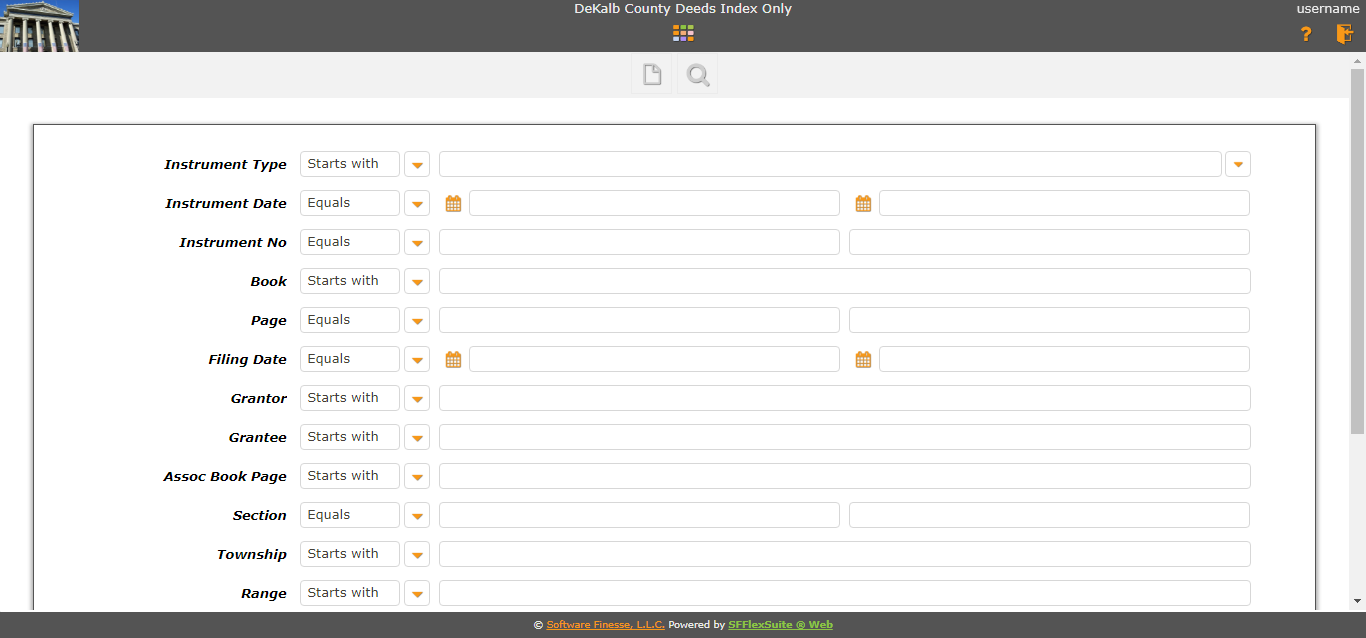
For most applications, when you first load it, you will be presented with a search form. The search form contains three main pieces of information for each field. The field name, the search option, and the value to search. The search options vary depending on the type of field. In some cases, the search options may not appear. The field value is the textbox or drop down menu you will enter your search terms into to perform a search. For a checkbox, you will select the value using a drop down menu instead of a checkbox. This will allow you to search for both the checked and unchecked state of the checkbox in a record as opposed to just one or the other. To return to the search form or to clear the search terms you have entered, click on the Clear Search button in the toolbar. The Clear Search button is available in all views.
Some applications automatically perform a search when they load and will take you directly to the results.
Grid View
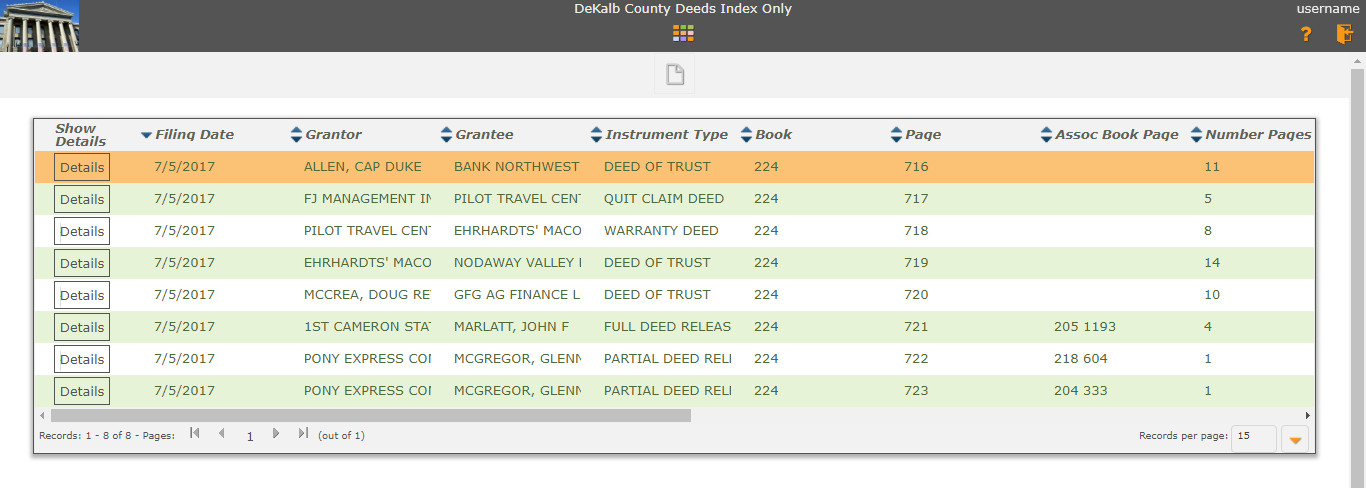
For most applications, when you perform a search you will see a grid containing the records found by your search. To view one record in particular, click on the Details button on the left side of the record's row to enter Form View. To view the full contents of a field on the grid in the event it gets cut off, simply hold the mouse cursor over the visible portion of the text to view it as a tooltip. To return to Grid View from Form View, click on the Go To Grid View button in the Form View toolbar. When returning to Grid View from Form View, the last viewed record will be highlighted, allowing you to find it easier if you want to go back to it.
You can change the number of records appearing on the grid by using the drop down menu on the bottom right corner of the grid, and you can change which page is displayed using the controls on the bottom left of the grid.
Form View
Form View is where you will see all of the details of a record. Depending on the application, you will come to Form View after a search instead of Grid View. Also, depending on the application, if only one record is found by your search, you will be taken directly to Form View for that record.
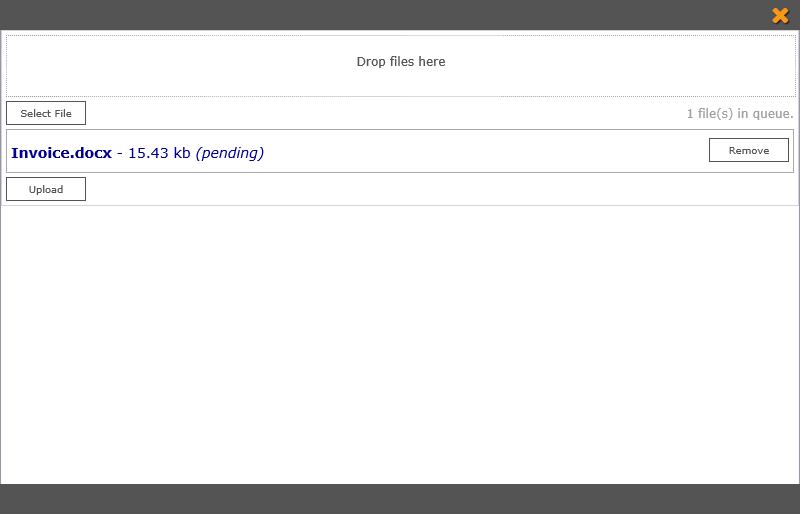
Some applications will have form view split into two or three panels depending on the information stored for the records. All applications have the main record panel, which is the one with the record information laid out in a form. If the main record can have multiple records, they will be displayed in a panel below the main record panel. These are displayed in grids much like Grid View and there may be more than one of them in this panel. Finally, if the record can contain documents or images, they will be shown in a panel to the right of the other panels.
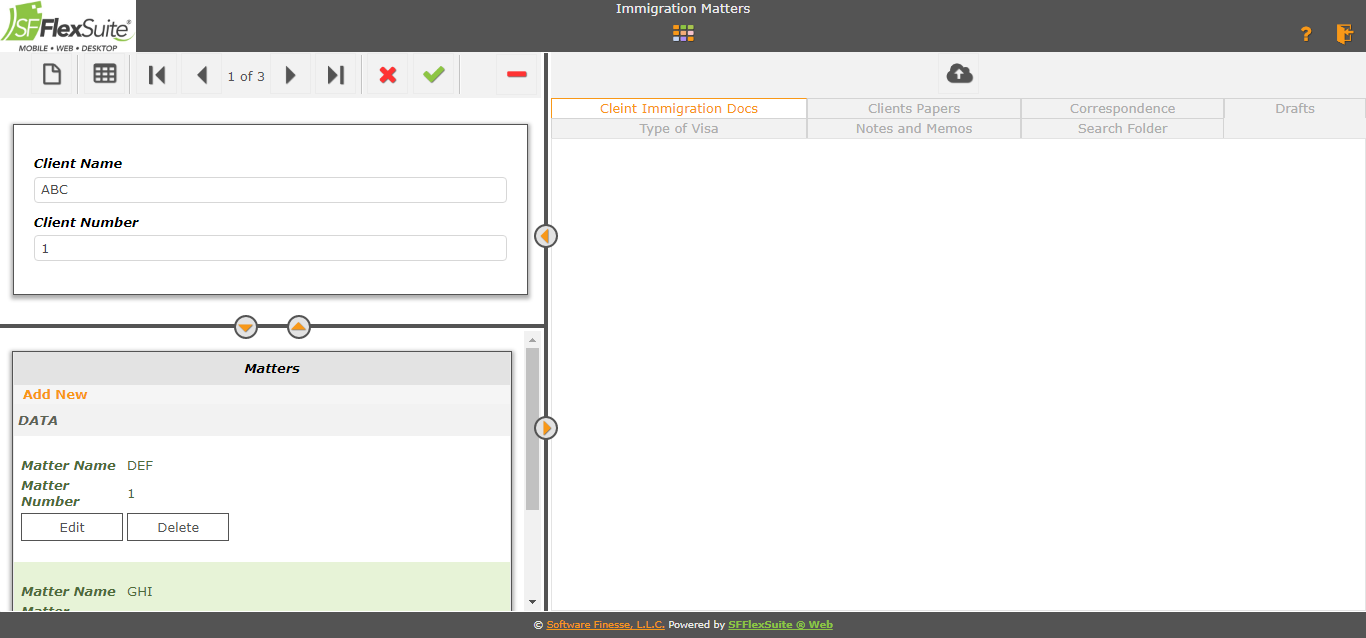
These panels can be minimized and resized. To show or minimize panels, click on the buttons on the bars separating the panels in the direction you wish to move the bar. Each bar has three stages using these buttons: hiding one panel, showing both, or hiding the other panel. In addition, clicking and dragging on the bar itself will allow you to freely move it to adjust the size of the two panels it separates.

Some applications will minimize certain panels when they load Form View, they can be shown by clicking on the arrow button on the separating bar on the edge of the screen.
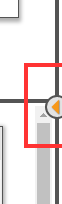
Image and Document Panel
The image and document panel contains a second toolbar which allows you to upload and download documents and images (if you have permission), rotate and zoom images, and navigate between documents and images. Below the toolbar is a set of tabs allowing you to view different folders containing documents and/or images. Depending on what the folder is set up to contain, the buttons in the toolbar will change. This panel has three view modes: file thumbnails, thumbnails and image, and just the image. These can be changed by clicking on their respective buttons on the toolbar.
Toolbar Buttons
- Search View
 Clear Search: Clears all search terms
 Search: Performs a search of the database using the entered search terms
 Add New Record: Opens Form View with a blank form to enter a new record
 Cancel: Clears all input for adding a new record using the search form
 Save: Saves the entered input on the search form into a new record
- Grid View
- Clear Search: Returns to Search View and clears all search terms
- Form View
- Clear Search: Returns to Search View and clears all search terms
 Go to Grid View: Changes to Grid View
 First Record: Switches to the first record of the search results
 Previous Record: Switches to the previous record in the search results
 Next Record: Switches to the next record in the search results
 Last Record: Switches to the last record of the search results
 View Report*: Opens the application's report using the search results
 View Report*: Opens a drop down to select one of the application's reports using the search results
 Export Images: Exports the images for the record in a zip file
 Export Records: Exports the records in the search results as a CSV
(Comma Separated Values) file
Export Records: Exports the records in the search results as a CSV
(Comma Separated Values) file- Add New Record+: Opens Form View with a blank form to enter a new record
- Cancel: Cancels any changes made to the main record and reloads the original values
- Save: Saves any changes to the main record
 Delete Record: Deletes the current main record. You must confirm this action
- * Only one of the report buttons will appear in an application, depending on if the application has one report or multiple reports. When a report is opened, it is opened in a new tab. Your popup blocker must be disabled for SFFlexSuite ® Web to view the report.
- + The Add New Record button is only available if you have added a record already and before returning to Search View. This allows you to add several records one after another without needing to return to Search View for each one.
- Image and Document Panel
 Thumbnails Only: Only displays file thumbnails
 Thumbnails and Images: Displays file thumbnails in a panel on the left side of the viewer and the image or document on the right
 Images Only: Only displays the selected image or document
 Print Preview: Opens a PDF of all of the images or documents in the current folder for printing
 Upload Files: Opens a window to select files to upload to the current folder
 Download Files: Downloads the selected files in the current folder
- First Image: Switches the first file in the current folder
- Previous Image: Switches to the previous file in the current folder
- Next Image: Switches to the next file in the current folder
- Last Image: Switches to the last file in the current folder
 Rotate Image: Rotates the image 90 degrees clockwise
 Zoom In: Increases the size of the image up to three times
 Zoom Out: Resets the size of the image to its original size
- Delete Image: Deletes the currently selected file. You must confirm this action
Using Applications
Search
To perform a search, go to Search View, either by loading an application or by clicking on the Clear Search button. In Search View, enter any search terms you want to look for into the fields provided. Not all fields for an application will be searchable and will not appear in Search View. To search for any value in a field, leave it blank. To perform the search, click on the Search button in the toolbar.
View Results
Most applications will display the search results in Grid View, though some will open in Form View. In Grid View, click on the Details button for the record you wish to view or edit and you will be taken to Form View. In Form View, you can switch between records by using the navigation buttons in the toolbar. You can also jump to the first or last record in the results.
Most applications have a limit to how many records can be found in a search. If the record you are looking for is not found in the result set, you will need to use more specific search terms to find it if you have hit the limit (Usually a multiple of 50 or 100).
Modifying Main Record Data
If you have permission to edit records in this application, you can do so by changing the values in the fields in Form View. Changes will not be saved until you click on the Save button in the toolbar. If any fields are required but not filled in when you save, you will be informed of this and the record will not be saved. To cancel your edits, click on the Cancel button in the toolbar.
Modifying Multiple Record Data
If you have permission to edit the multiple records of the main record, you can do so by clicking on the Edit link on the left side of the record's row in its respective grid. Doing so will open a window with a form to modify the contents of that record. At the bottom of the form will be a Save button that will save the record. If any required fields are unfilled, you will be notified and the record will not be saved. If you wish to cancel your edits, simply close the window by clicking on the X in the corner of the window.
If you have permission to add new multiple records to the main record, an Add New link will appear in the upper left corner of the grid for those that can be edited. Clicking on this link will open the same window that clicking the Edit link opens and works in the same way. Depending on the application, this window may clear and remain open after saving a new record, allowing you to quickly add multiple records to the main record. In addition, some applications may allow you to use numeric ranges in some fields (Like 1-5) to create many similar records at once. Your administrator should inform you if this feature is available and which field(s) allow it.
If you have permission to delete multiple records from the main record, you will see a Delete link in each row of the grids that allow it. It will be next to the Edit link if it is present with a bar separating the two. To delete the record, click on the Delete link for that record. A window will appear asking you to confirm the deletion. If you wish to delete the record, click OK in the window, otherwise click Cancel.
Accessing Documents and Images
If the application has documents and you have permission to view them, they will appear in the document and image panel in Form View. To view a document or image, select it, either by clicking on its thumbnail if they are visible or by navigating to it using the buttons in the toolbar. You can also use the arrow keys on your keyboard to navigate between images. in the same manner as using the navigation buttons. If you have permission to print or download documents, click on the Print or Download buttons in the toolbar. Some files that may be included with a record may not be able to be displayed within a web browser. If you select one of these files, a message will appear in the image portion of the panel informing you of such, and will instruct you to use the Download button to retrieve the file.
When downloading files, depending on the application, the file(s) will be downloaded as a zip file. If the application is not set up to zip the files, they will be downloaded normally.
Uploading New Documents and Images
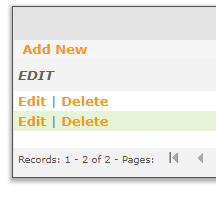
If you have permission to upload new documents and/or images, the Upload button will appear in the toolbar. To upload files, click on the Upload button. A window will appear where you can specify which files you wish to upload. The files will be uploaded into the currently selected folder indicated by the tabs in the image and document panel. To select files, either drag them into the space provided at the top of the window or click the Select Files button to browse for files. If you wish to remove a file before uploading, click on the Remove button next to the file. Once you have selected which files to upload, click on the Upload button in the window to begin uploading them to the portal. Once they have finished (you will receive a message), you may close the window by clicking on the X in the upper right corner, or add more files to upload using the same methods described before.
Viewing Reports
Some applications have reports based on either the search result set or the current record. If you have permission to view these reports, the Reports button will appear in the toolbar. If more than one report is available, when you click on the button, a menu will appear, allowing you to select which report you wish to view. The report will open in a new tab in your browser. Please note that you may need to disable your popup blocker in order to view reports. When you have finished with the report, simply close the browser tab containing it.
- Report Toolbar Buttons
- Print Report: Opens the print dialog of your browser to print the report
 Save as PDF: Exports the report to a PDF file and downloads it to your computer
 Save to Record as PDF*: Exports the report to a PDF file and attaches it to the current record in the currently selected folder
- * The Save to Record as PDF button will only appear for certain reports if the generated document should be saved as part of the record
Creating New Main Records
If you have permission to add new main records, you will see additional buttons on the Search View toolbar. There are two methods of adding new records, which is used depends on the application.
If the Add New Record button is visible in the toolbar, clicking it will open a blank form for you to enter in the record's data. When you have finished, click on the Save button to save the main record. Once you have saved the main record, if the application uses multiple records or documents and images, those panels will now appear, allowing you to add those to the record. From this point, until you go back to Search View, you can continue adding new records by clicking on the Add New Record button still in the toolbar.
If the Save and Cancel buttons are visible in the Search View toolbar, you may enter the new record's data into the search fields. Click on the Save button to create the new main record. If the application uses multiple records or documents and images, those panels will now appear, allowing you to add those to the record. From this point, until you go back to Search View, you can continue adding new records by clicking on the Add New Record button still in the toolbar.